Roofing website builder or custom site?
Most homeowners look for a roofer at one of two moments. Something is wrong, such as a leak, missing shingles or storm damage. Or they are planning a replacement and comparing companies. Your site has to serve both: fast help for the first group and enough proof for the second.
A roofing website builder and a custom site can both do this. The difference is how much of the work you do yourself and how far the site can grow.
When a roofing website builder makes sense
Hosted builders such as Wix and Squarespace give you templates, hosting and editing in one place. WordPress with a roofing or contractor theme gives you more control and a large choice of plugins. A roofing website builder can be a good fit when:
- You are a small or new roofing company with a handful of services.
- You serve one main town or a small area.
- You are comfortable writing your own pages and uploading photos.
- You want to launch simply and improve the site over time.
When a custom site is the better choice
A custom site is planned around your services, your area and the way you run estimates. It can still be built on WordPress, Webflow or a hosted builder so you can edit it later. It is usually worth it when:
- You cover many towns and want a real page for each one.
- You do residential and commercial roofing and need two clear paths.
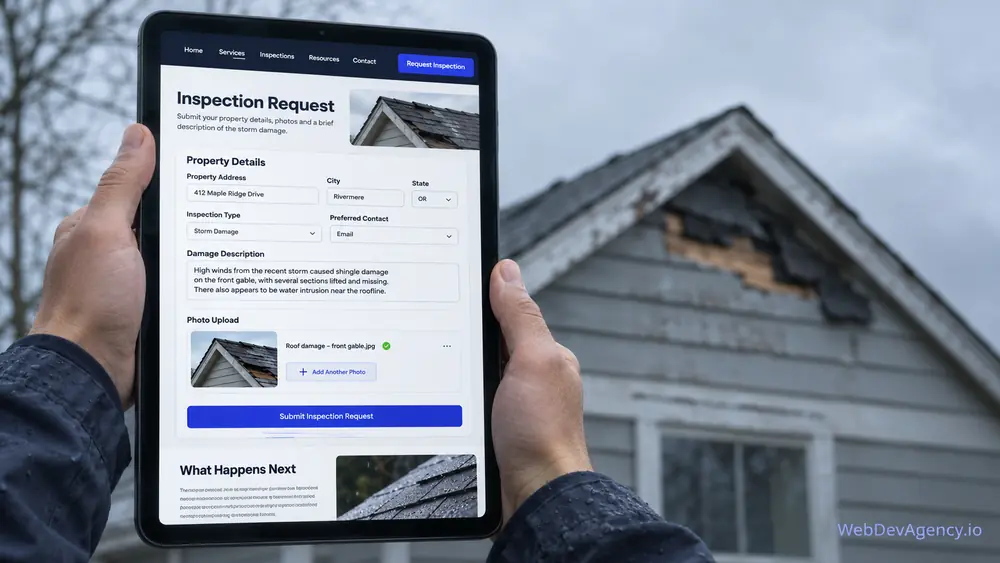
- You want estimate forms with photo uploads and different questions for repairs and replacements.
- Your roofing website builder template looks like the sites of other roofers in your market.
- You run storm response work and need pages you can update quickly.
Whether you use a roofing website builder or a custom design, the steps below are the same.
How to build a roofing website step by step
Here is how to build a roofing website in a practical order. Each step builds on the one before it.
- Define your services and area. List the work you want more of and the towns you cover. Note anything you do not do, such as commercial flat roofs or very steep slopes.
- Pick your route. Choose a roofing website builder, WordPress with a theme or a custom design, based on the points above.
- Plan your pages. Map one page per main service, one page per key town and the supporting pages listed in the next section.
- Gather real content. Collect project photos, crew photos, your license and insurance details, warranty terms and links to your reviews.
- Write each page. Answer the questions homeowners ask on the phone, in plain words.
- Set up estimate and inspection requests. Add a short form, tap-to-call buttons and a confirmation email.
- Connect local search. Complete your Google Business Profile and link it to your site.
- Test on a phone. Request an estimate yourself and call the number from the site before you launch.
Pages a roofing website needs
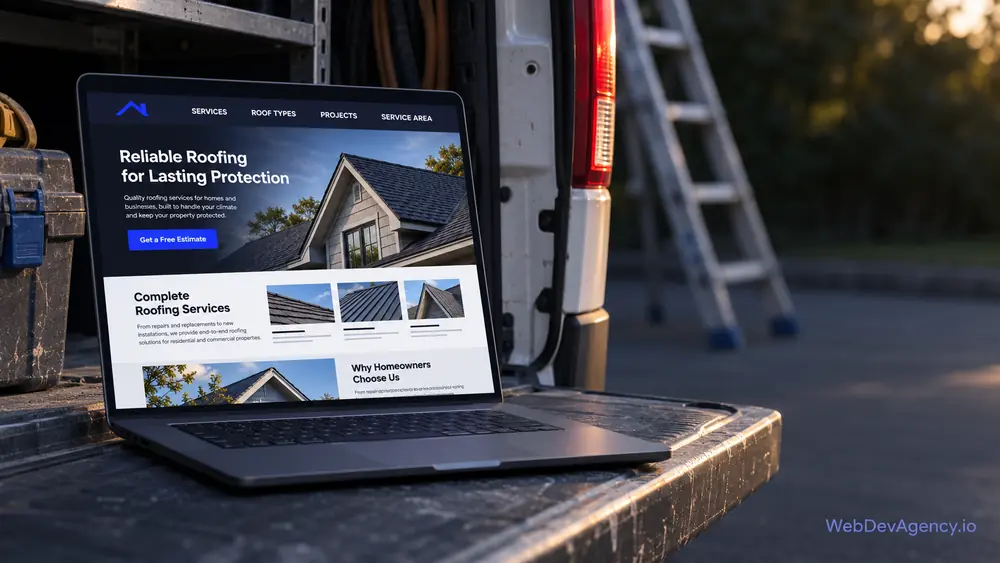
A roofing site works best when each main service has its own page. That helps homeowners find the right information and helps search engines understand what you do.
Repair pages
Roof repair is often urgent. Explain the problems you fix, such as leaks, flashing issues, damaged shingles and storm damage. Tell people what to do while they wait, such as moving valuables and placing a bucket under a drip, and say whether you offer emergency tarping. If you answer calls after hours, say exactly when. Do not claim round-the-clock service unless someone really picks up.
Replacement pages
Replacement is a bigger decision, so this page needs more detail. Explain the signs that a roof may need replacing rather than repair. Walk through your process, from inspection and estimate to tear-off, installation and cleanup. List the materials you install, such as asphalt shingles, metal, tile or low-slope systems, and give a short note on when each one fits.
Inspection pages
Many homeowners need an inspection before buying or selling a home, after a storm, or simply to check an older roof. Explain what your inspection covers, what the homeowner gets afterward, such as a written summary with photos, and whether there is a fee.
Storm damage and insurance claim pages
Storm damage brings a lot of searches and a lot of questions. Explain what storm damage looks like, why it is worth a prompt inspection and how you document it. Describe in general terms how you work with homeowners during an insurance claim, such as providing photos and a written estimate.
Be careful here. Rules about contractors and insurance claims differ by state, and some states limit what a roofer can do or say. Do not promise that a claim will be approved or that a roof will be covered. Check your state's rules and keep the page factual.
Warranty and materials pages
Homeowners often confuse manufacturer warranties with workmanship warranties. A short page that explains the difference, and what your company offers, prevents confusion later. Only describe warranty terms you actually provide, and link to the full written terms if you have them.
Service area pages
Create a page for each key town or county you serve. Make each one useful: projects you have completed there, common roof types in the area, and local permit or HOA notes the homeowner should know. Pages that only swap the town name rarely help anyone.
Supporting pages
Round out the site with an About page that shows the owner and crew, a page on licensing and insurance, a reviews page, a financing page if you offer financing through a lender, and a contact page with your address and hours.
Estimate and inspection requests
Your estimate path is the part of the site that turns visitors into jobs. On a phone, it should take a few taps.
Click-to-call everywhere
Put a tap-to-call phone number in the header of every page. On phones, a sticky call button at the bottom of the screen helps people who have an active leak. Use the same number everywhere so calls are easy to track.
A short, smart form
A good roofing estimate form asks for:
- Name, phone and email
- The property address or ZIP code
- The type of request: repair, replacement, inspection or storm damage
- The roof type, if they know it
- A short description of the problem
- Photo upload, marked optional
- Whether an insurance claim is involved, marked optional
Keep required fields short. Tell people what happens next and when they will hear from you, and only promise what you can keep. Never ask homeowners to climb onto a roof to take photos. Ground-level photos or interior photos of ceiling stains are enough.
A clear next step
After the form is sent, show a thank-you message that explains the next step, such as a call to schedule the inspection. Send the same details in a confirmation email.
Project photos and reviews
Roofing is expensive and visible. Homeowners want proof that you do good work and treat their property with care.
Photos that show the job
The most useful project photos show the roof before, during and after the work. Include close-ups of details such as flashing, ridge vents and clean edges. A few photos of the crew protecting landscaping or cleaning up the yard can matter as much as the finished roof. If you use drone photos, follow local rules for flying.
Group projects by service and by town. A homeowner in a particular suburb likes to see a roof finished a few streets away.
Reviews you can trust
Ask happy customers for a review after final cleanup, while the job is fresh in their mind. Send a direct link to your Google review page. Reply to every review, including critical ones, calmly and helpfully. Do not post fake reviews or offer payment for them. If you show reviews on your site, quote them word for word.
Trust after a storm
After a big storm, homeowners worry about out-of-town crews who knock on doors and then disappear. Show that you are local: your office address, how long you have served the area if you want to say so, your license details and real photos of your team. This is one of the strongest reasons a homeowner chooses one roofer over another.
Local search basics for roofers
Most roofing work comes from nearby, so local search matters more than broad national rankings.
Your Google Business Profile
Complete every section of your profile. Use the same business name, address and phone number as your website. Set your service area, pick accurate categories, add real project photos and keep your hours current. Link the profile to your site, and link your site to the profile.
Service-area pages done properly
Your town pages support your local presence. Link to them from the homepage and the footer. Make each one specific, with nearby projects and local notes, rather than a copy with a new town name.
On-page basics
Give every page a clear title and description that names the service and the area. Use headings that match what homeowners search for, such as roof repair, roof replacement and roof inspection. Compress images so pages load quickly on mobile data. Add structured data for your business and your FAQ where it fits.
When to get help beyond a roofing website builder
You can build your first site with a roofing website builder. It makes sense to get help when you need many service and town pages, a detailed estimate process or a site that stands apart from other local roofers.
Our roofing website design service builds roofing sites around your services, service area and estimate process. We set up click-to-call, estimate forms and local SEO basics, and you can still make simple edits after launch.
At WebDevAgency.io, packages are $199 for Basic, $349 for Standard and $599 for Premium, with a Custom option for larger projects. Platform costs, such as hosting, your domain, platform plans and paid plugins, are not included and are billed separately. See our pricing page for every package.
If you also do siding, gutters or general remodeling, our guide to choosing a contractor website builder covers the wider contractor site.
You can read more about our team and how we work on the WebDevAgency.io homepage.
Key takeaways
- A roofing website builder suits small, simple sites; a custom site suits many towns, services or storm work.
- Give repairs, replacements, inspections and storm damage their own pages.
- Keep insurance claim content factual, and never promise a claim outcome.
- Put tap-to-call in the header and keep the estimate form short.
- Before, during and after photos, plus honest reviews, build trust.
- A complete Google Business Profile and real town pages support local search.
Frequently asked questions
What is the best roofing website builder?
The best option depends on your business. Hosted builders such as Wix and Squarespace are simple to manage, WordPress offers more control and room for many pages, and a custom design fits your exact services and area. Pick the one that handles service pages, photo galleries and estimate forms well on a phone.
How do I build a roofing website?
Start by listing your services and service area, then choose a builder or a custom route. Plan one page per main service and key town, gather real photos and license details, and set up a short estimate form with tap-to-call. Connect your Google Business Profile and test everything on a phone before launch.
Should a roofing website mention insurance claims?
It can, as long as the content stays factual. Explain what storm damage looks like and how you document it, and describe your role in general terms. Rules differ by state, so check yours, and never promise that a claim will be approved.
What pages should a roofing company website have?
Most roofing sites need pages for repairs, replacements, inspections and storm damage, plus service area pages for key towns. Add an About page, licensing and insurance information, warranty details, reviews and a contact page. A financing page helps if you offer financing through a lender.
How do roofers get more leads from their website?
Make calling and requesting an estimate easy from every page, especially on a phone. Show real project photos and reviews, explain your process and keep your Google Business Profile complete. Specific service and town pages help the right homeowners find you.
Ready to plan your roofing site? Tell us about your services and service area on our contact page, and we will reply within one business day with a free, fixed-price quote.